Playing with Color
Sunset Magazine
by Ann Bertelsen
photographs by Teena Albert
Want to come in my house? If it's anything like this colorful portable structure designed by Barbara Butler, the answer will surely be yes.
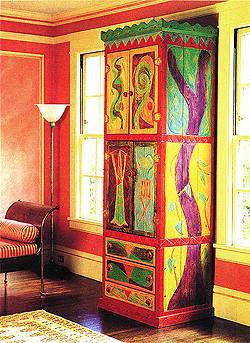
THE TOWER OF POWER
When I carve a piece, I'm thinking about how I'm going to color it." says Butler. The top of this armoire houses stereo equipment, while the television is concealed behind the hinged door, in the middle. "The day I install this piece in my clients' living room, their children loved it so much, they began to draw on it with Magic Markers," Butler says laughing. "I had to come back and sand it off, then paint over it again." Butler's custom furniture is priced from $700; her limited chests at $450; and her new line of portable playhouses begins at $3,900.
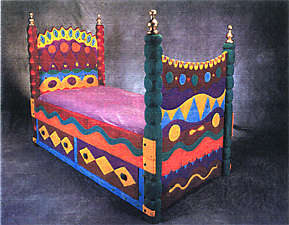
Noah's Bed
"People tend to shy away from using too many bright colors," says Butler. "In my case, I usually can't apply enough of them." This twin bed demonstrates her point. The bright purple and yellow teamed with turquoise and red make a big splash. The richness of the colors comes from the way Butler carves the design into the furniture before applying the paint stains: Small grooves made with an electric carving tool prevent the different stains from spilling onto each other when she applies them to the wood. The stain also collects in the grooves, intensifying the color.
"I try to make all my furniture sing. If it doesn't sing, then I won't be happy with it."- Barbara Butler
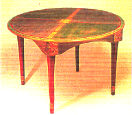
Party of Four
More subdued than her other pieces, this elegant, pine-top table is embellished with copper detailing, which gives it a rich finish. Note the hand-sculpted redwood legs andhow the carved rim holds the bright redcolor.
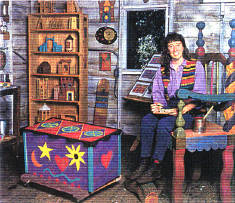
Barbara Butler's toy chest
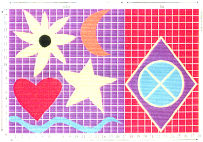
"I try to make all my furniture sing." says Butler. "If it doesn't sing, then I won't be happy with it." Butler is happiest when she can let loose with color. She teams purple and red with bright color splashes on the toy chest she made for Sunset with a scallop on the lid and trim on the corners (above). Here's how to carve and paint an unfinished chest (without scalloped edges) using Butler's templates and stains. Adapt the templates to fit the size of your chest, or create your own designs.
TIME
Carving: 2 hours
Making the stains: 2 hours
Staining: 2 hours, plus drying time
Varnishing: 2 hours, plus drying time
WHAT YOU NEED
Untreated chest (18 inches deep by 36 inches wide by 18 inches high).
Templates (see designs at right)
Pencil
1-gallon paint can
Safety goggles
Dust mask
Electric carving tool (Dremel, Ryobi, or Black & Decker) with 1/2 inch drum-sander attachment
Package of 1/2 inch fine (120 grit) bands for drum sander attachment
Scrap wood
Sandpaper (150 grit)
Homemade oil stains (see page 80) or commercial paint
Rags
Artist's brushes
Foam-pad brush
Water-base varnish (such as Varathane's Diamond Finish)
FOR THE LID
With a pencil, draw a guideline 2 inches in from the edge all the way around the lid. Place the diamond template (see below) inside the guideline at one end of the lid, with three points touching the guideline, and trace the diamond. Move the template over to make a second diamond touching the first, and trace . Repeat the process for the third diamond, which should meet the guideline at the far end of the lid. Use a 1-gallon paint can as template for the circles, then draw an X inside each circle.
FOR THE FRONT, SIDES, AND BACK
Lay the chest on its back and arrange the templates (below) to match the front of the chest shown. Trace around each template with a pencil. Repeat to trace designs on sides and back.
CARVING THE CHEST
When carving, wear safety goggles and a dust mask. Using an electric carving tool with a 1/2-inch drum sander attachment, practice carving on some scrap wood. "I hold the tool with both hands and use the bottom hand to steady myself against the work. " says Butler. The goal isn't to carve a perfectly straight line.